Obtain feedback from customers
Written By Janina
Last updated 6 months ago
In Proyex, customer feedback is not provided via tasks or comments, but via revisions.
Revisions ensure that:
Feedback is clearly bundled
Approvals are documented in a traceable manner
Deadlines are binding
nothing is lost in the project
🧭 Important to note
A revision is not automatically created when you:
complete a task
or finish a milestone
Feedback is only collected if you actively create and publish a revision.
Step 1: Create a review in the project
Revisions are always created directly in the respective project.
Here's how to do it:
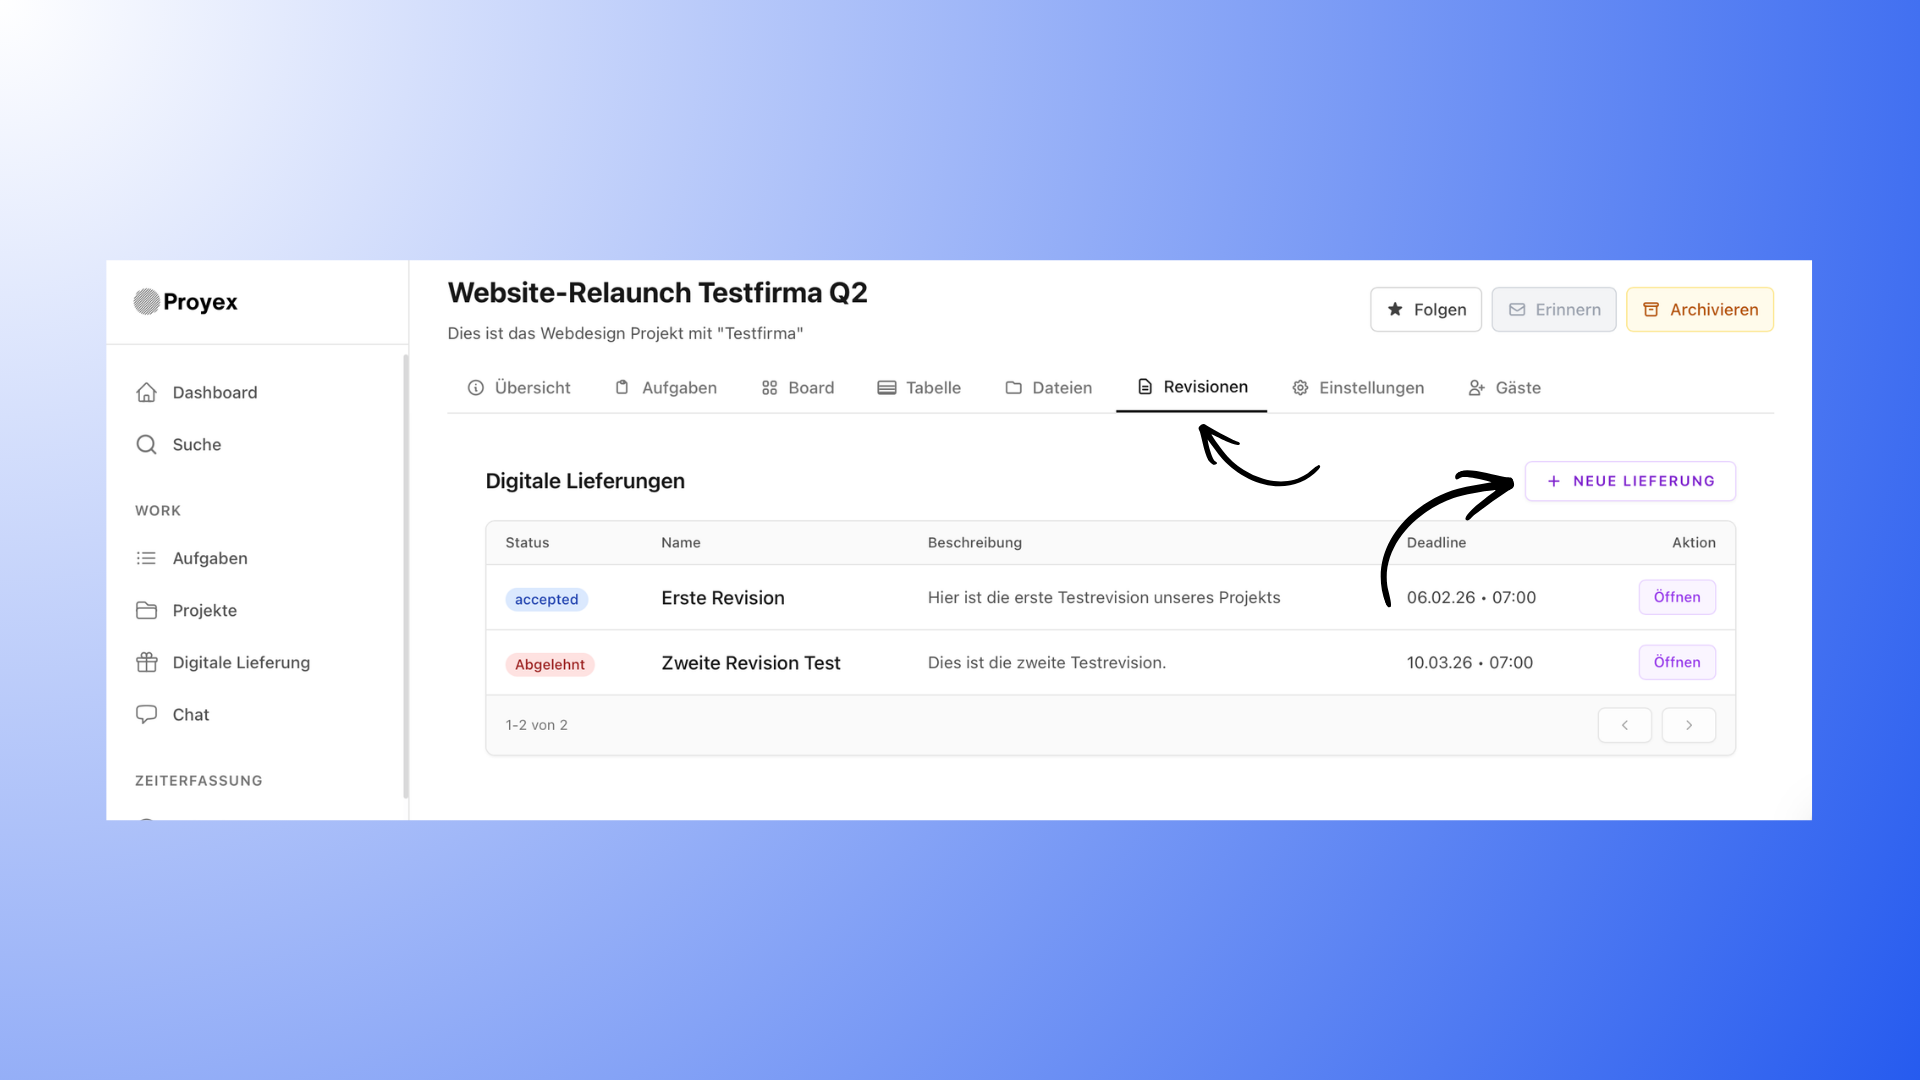
Open the desired project
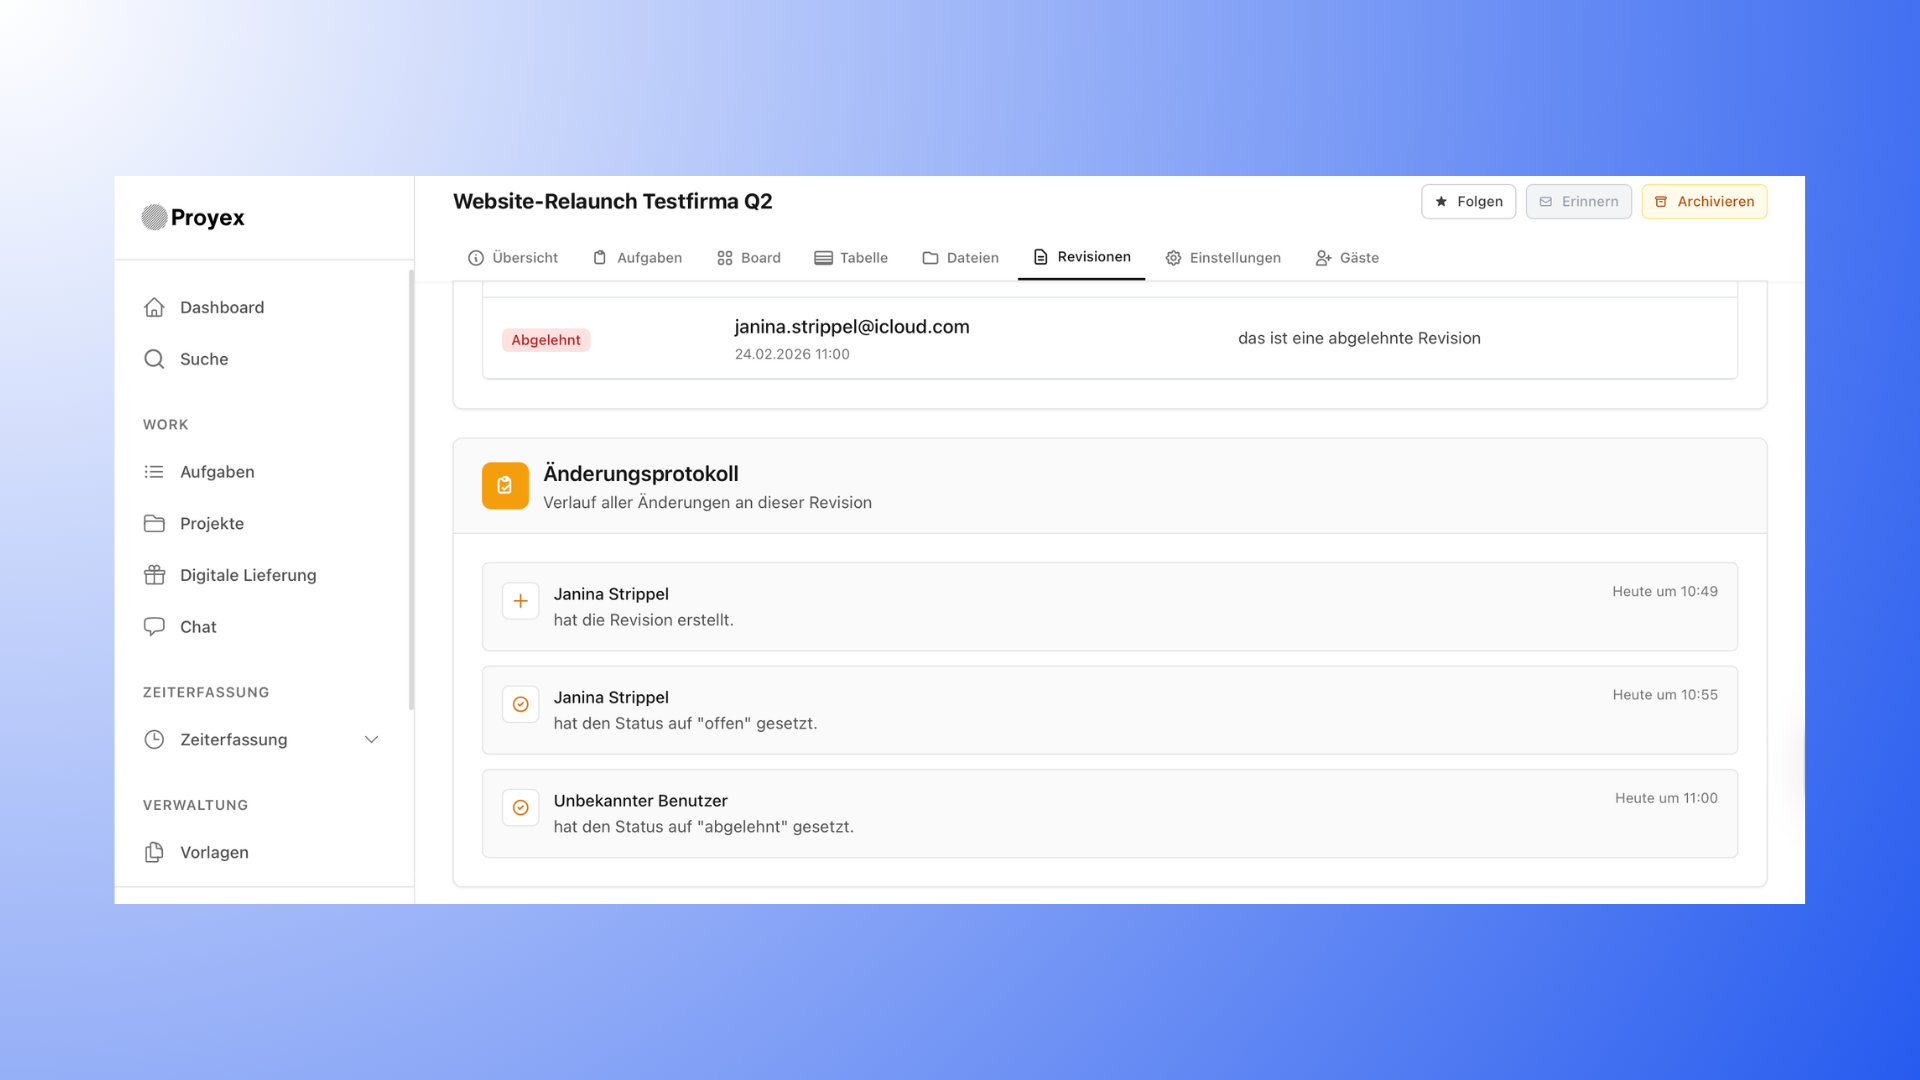
Click on "Revisions" in the menu
Select "Create new revision"
Now you can create the revision.
Step 2: Configure the revision
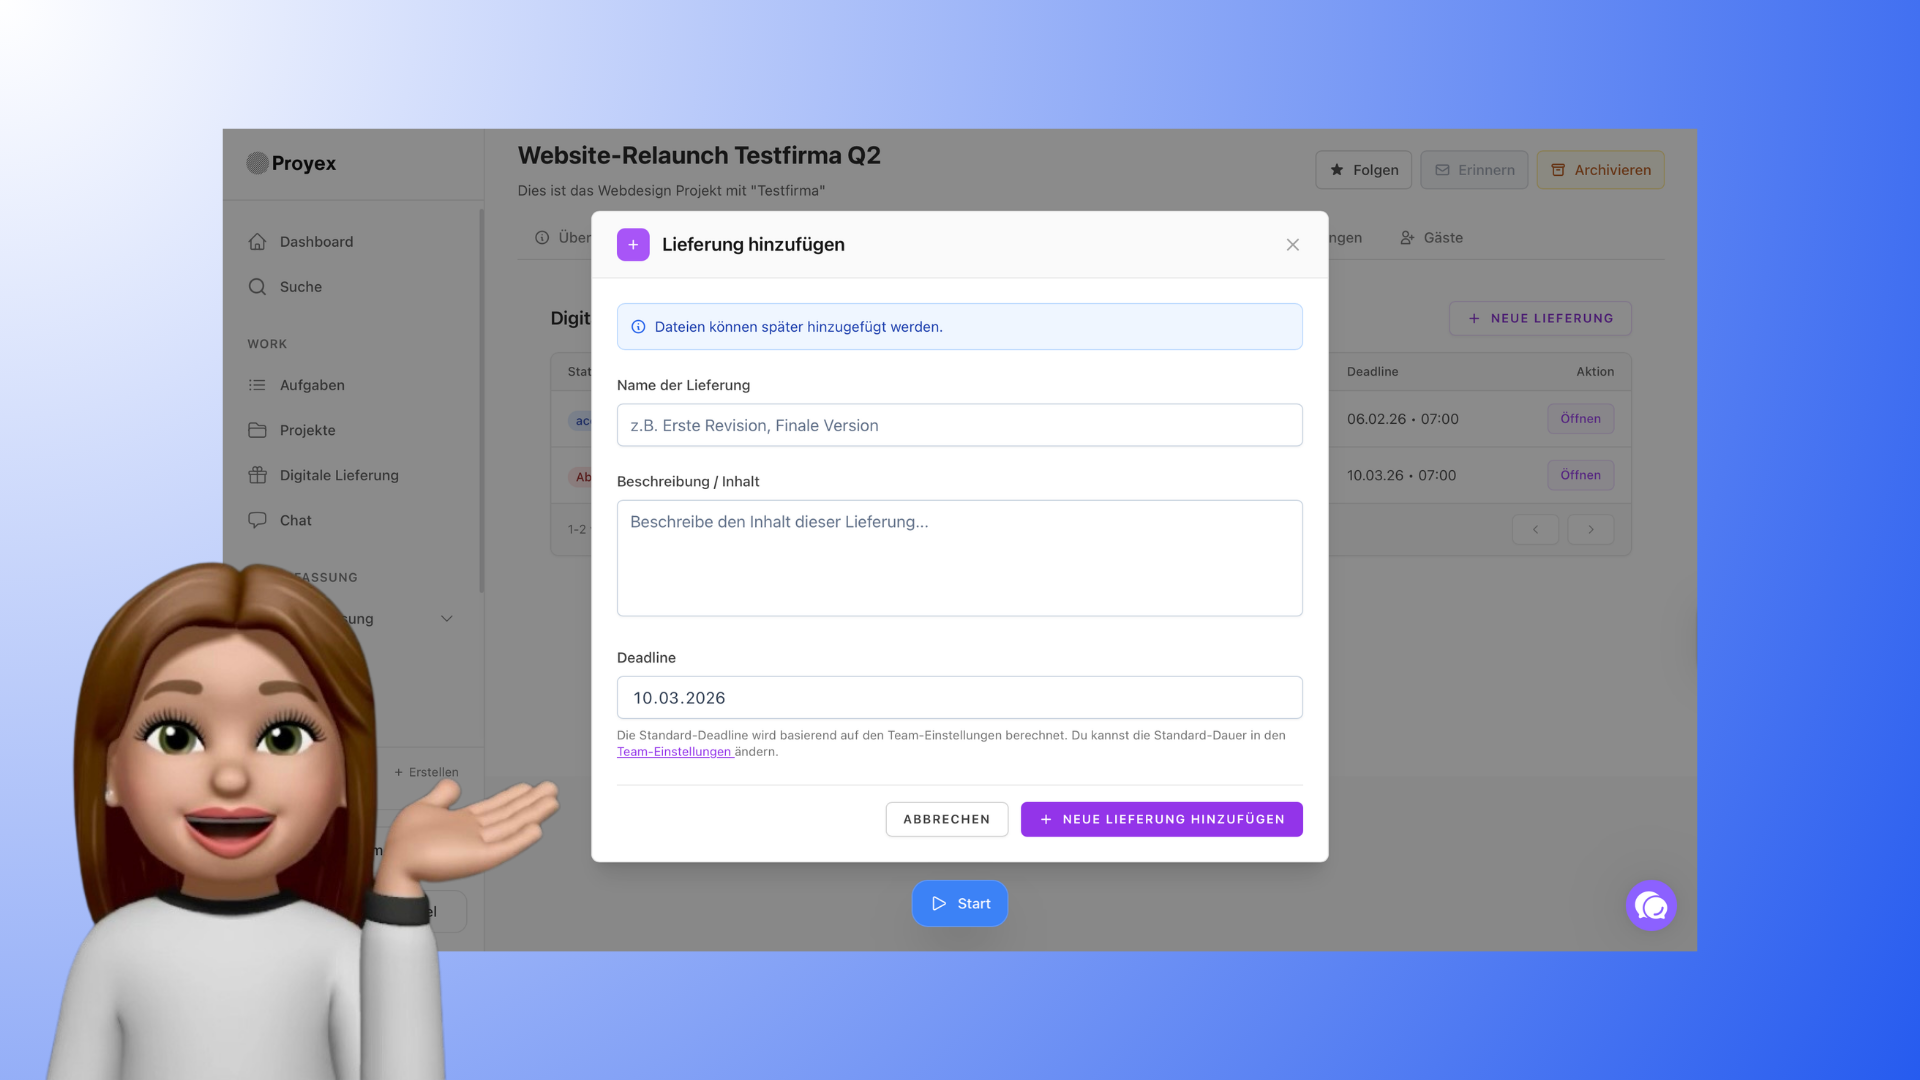
When creating the revision, enter the following information:
Title of the revision (e.g., "Logo designs round 1")
Optional: Description (e.g., notes or context)
Deadline (required field)
The deadline determines how long your client has to review the delivery.
👉 If the customer does not respond within this period, the revision is automatically considered accepted.
Your customer will receive reminders by email during this time.
Step 3: Upload files
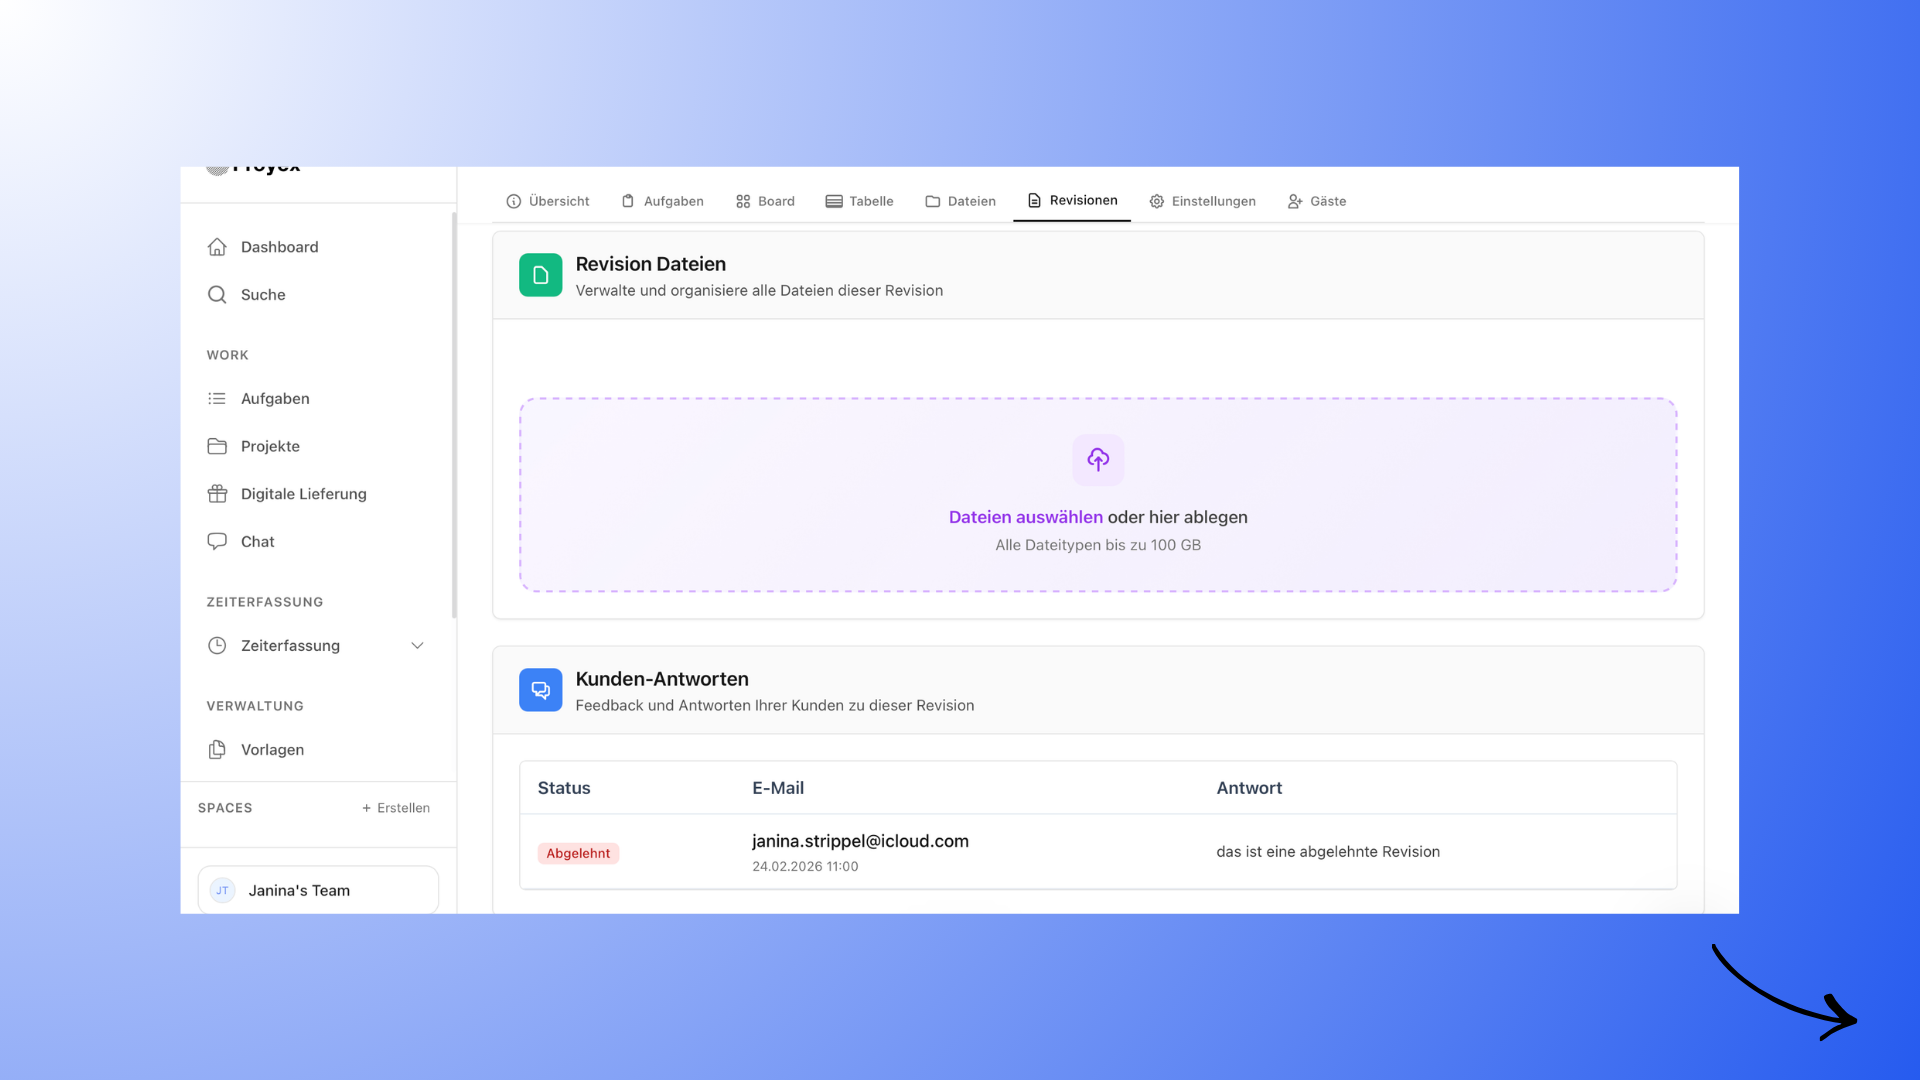
In a revision, you can:
add a description
upload one or more files
add files up to 100 GB
Typical example:
You upload design drafts as a presentation PDF and ask for approval.
Important:
Customers cannot comment on individual files, but give their feedback on the revision as a whole.
Step 4: Publish the revision
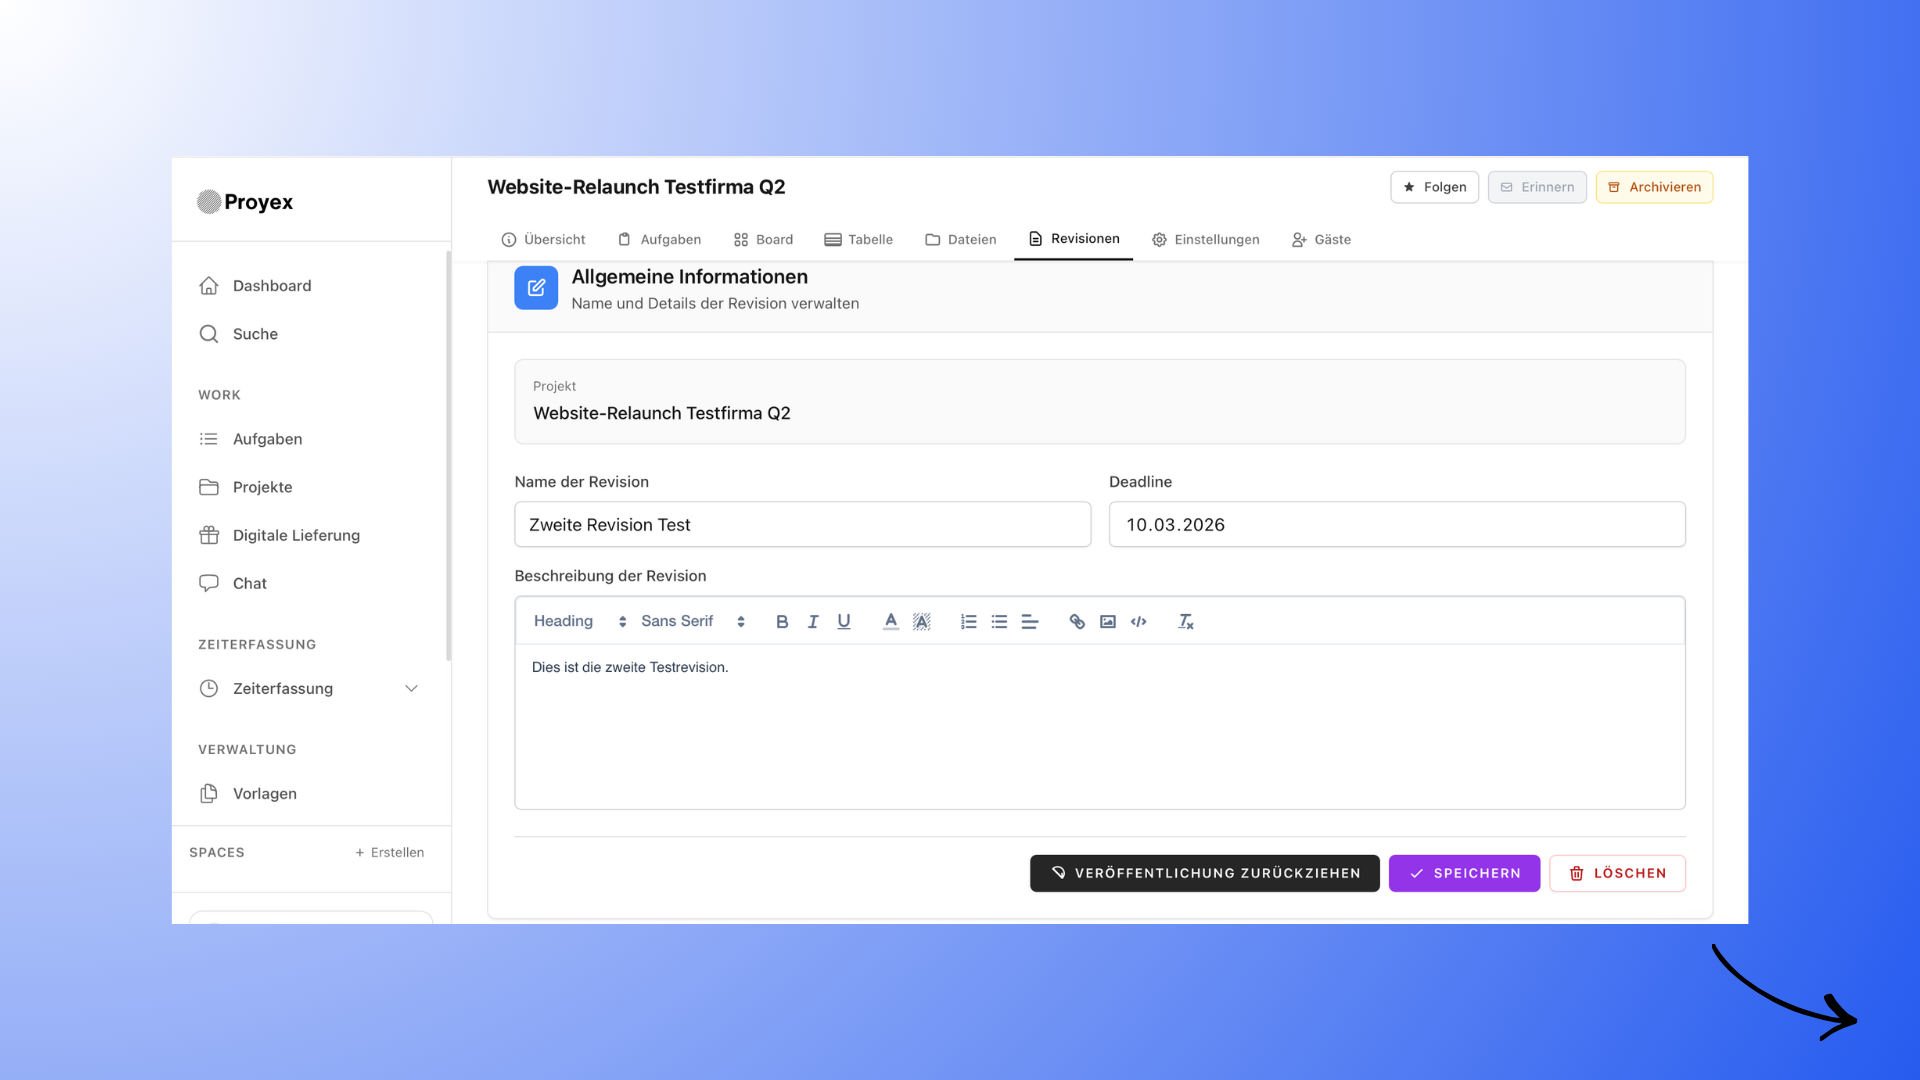
Once you have everything ready, publish the revision.
Only then will it be visible to the customer.
You can:
publish a revision
withdraw the publication
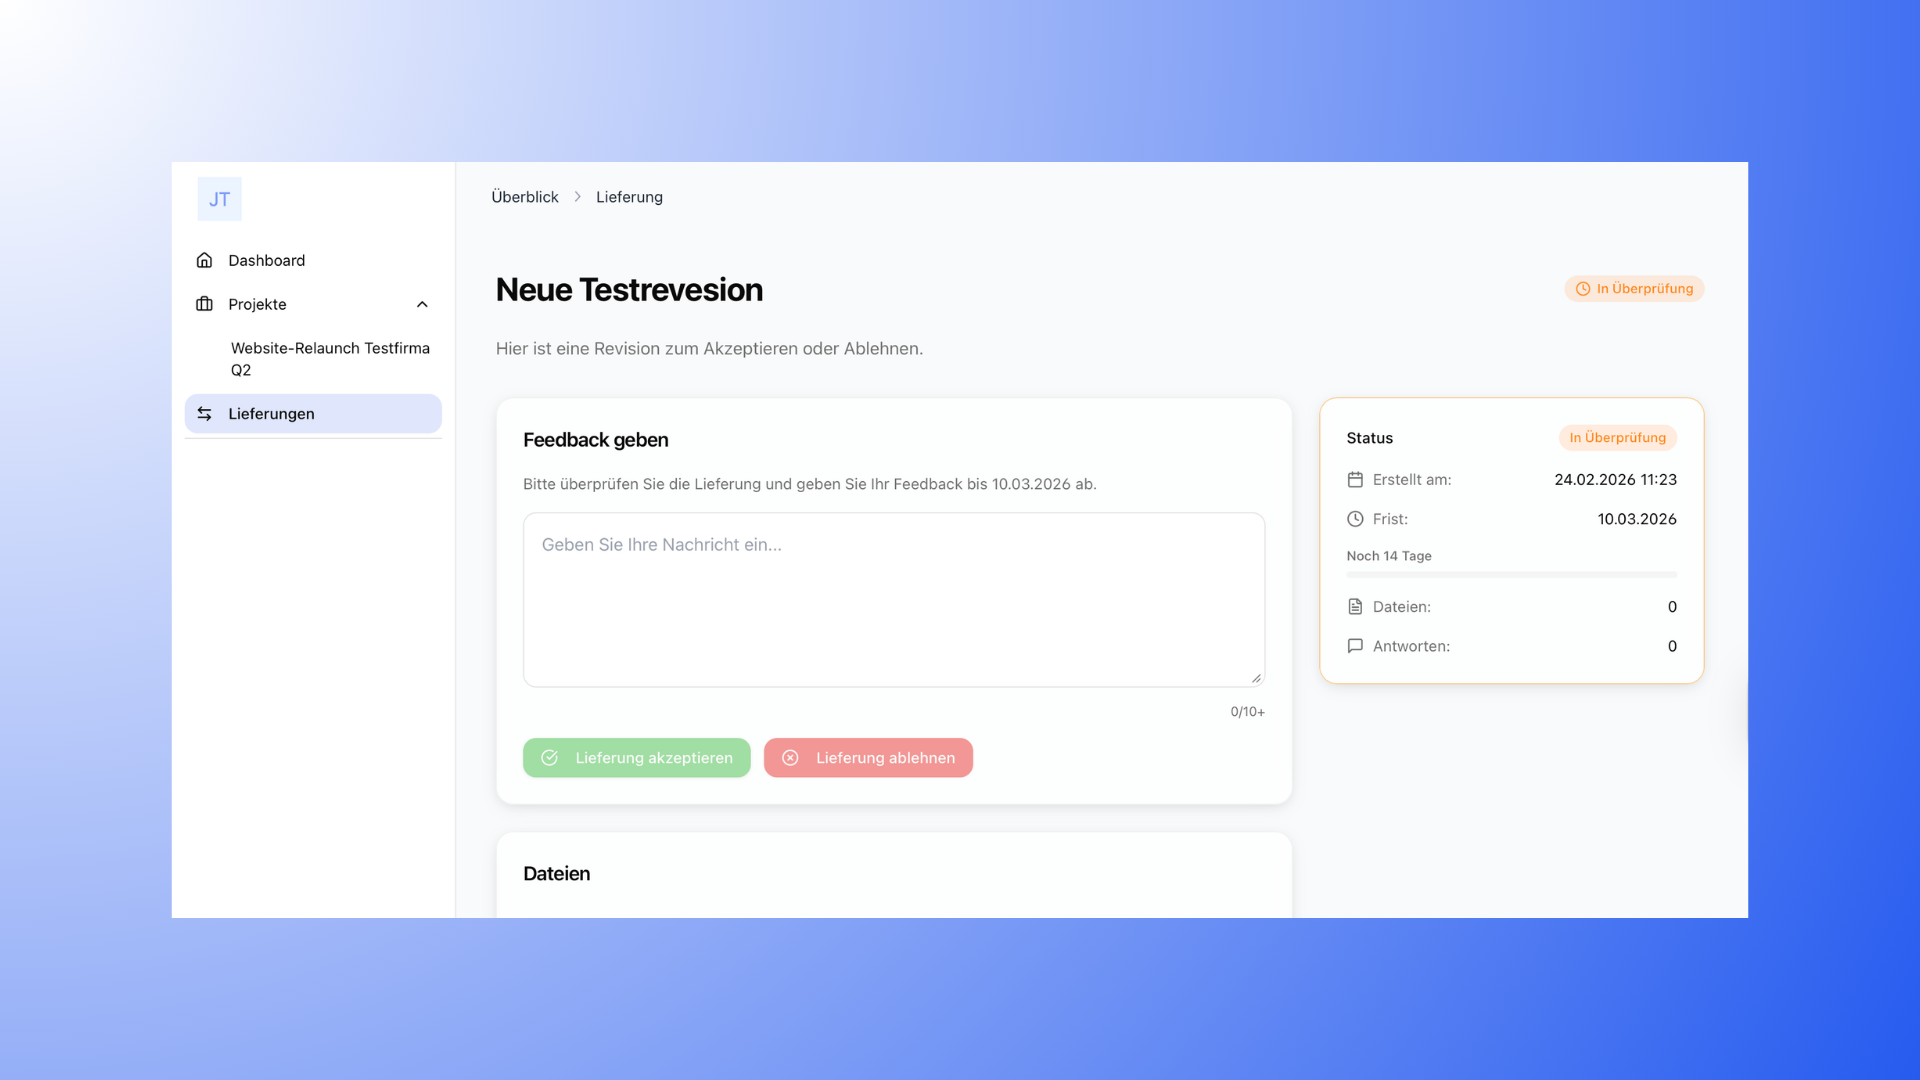
Once it is published, the customer will see the following message:
"Please check the delivery and submit your feedback by [date]."
Step 5: How the customer provides feedback
The customer can:
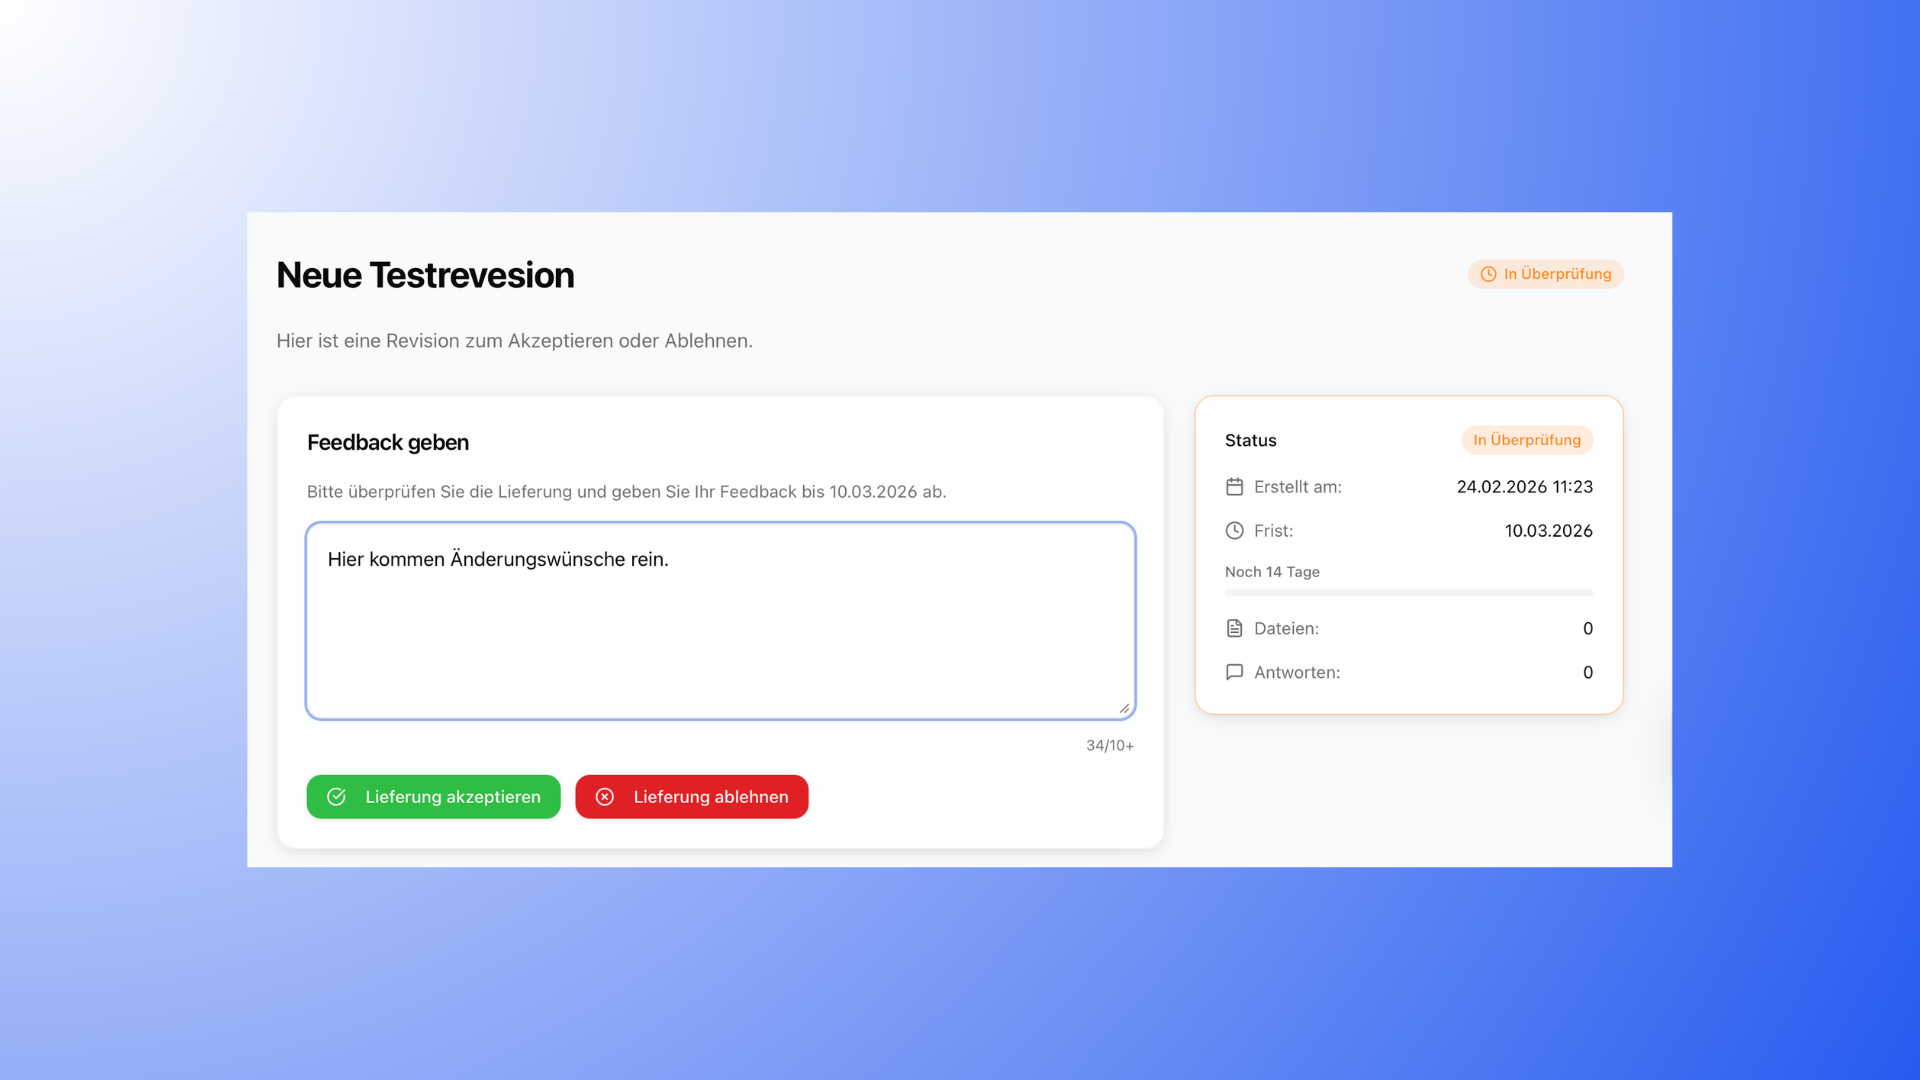
Leave a comment in the text field
approve the revision
or reject the revision
The customer must leave a brief comment before accepting or rejecting.
All changes and feedback are documented in the change log.
What happens next?
✅ If the customer approves
The revision is complete
You can continue working on the project
You can optionally store the final files permanently in the "Files" area
❌ If the customer rejects
In this case, it makes sense to:
to implement the adjustments
then start a new revision
This keeps feedback rounds clearly separated.
You should clarify with the customer in advance how many revisions are possible (e.g., "3 revisions included").
Maintaining an overview as a customer
Your customer can find all revisions in the project under the menu item "Revisions."
There they will see:
Status (open, approved, rejected)
Creation date
History in the change log
This allows your customer to keep track of open deliveries at all times.
Why feedback does not run via tasks
In tasks, customers can:
Upload files
Change status
However, they cannot write comments there.
Revisions are therefore the only way to provide structured feedback.
💡 Good to know
Revisions are not created automatically. You must actively create them.
Name revisions clearly (e.g., "Web design homepage – Round 1").
Before the project starts, determine how many revisions are included so that there are no disagreements between you and your clients.
Use deadlines consciously to avoid unnecessary delays in projects.
Feedback always belongs in revisions, not in emails or messengers.