Create and Edit Assignments
Written By Janina
Last updated 25 days ago
Tasks are at the heart of your projects in Proyex.
You use them to plan work steps, assign responsibilities, and keep track of your progress at all times.
🧠 How do tasks work in Proyex?
Tasks are always part of a project.
Each project has its own task structure and can be displayed in different views:
List view
Board (Kanban)
Table view
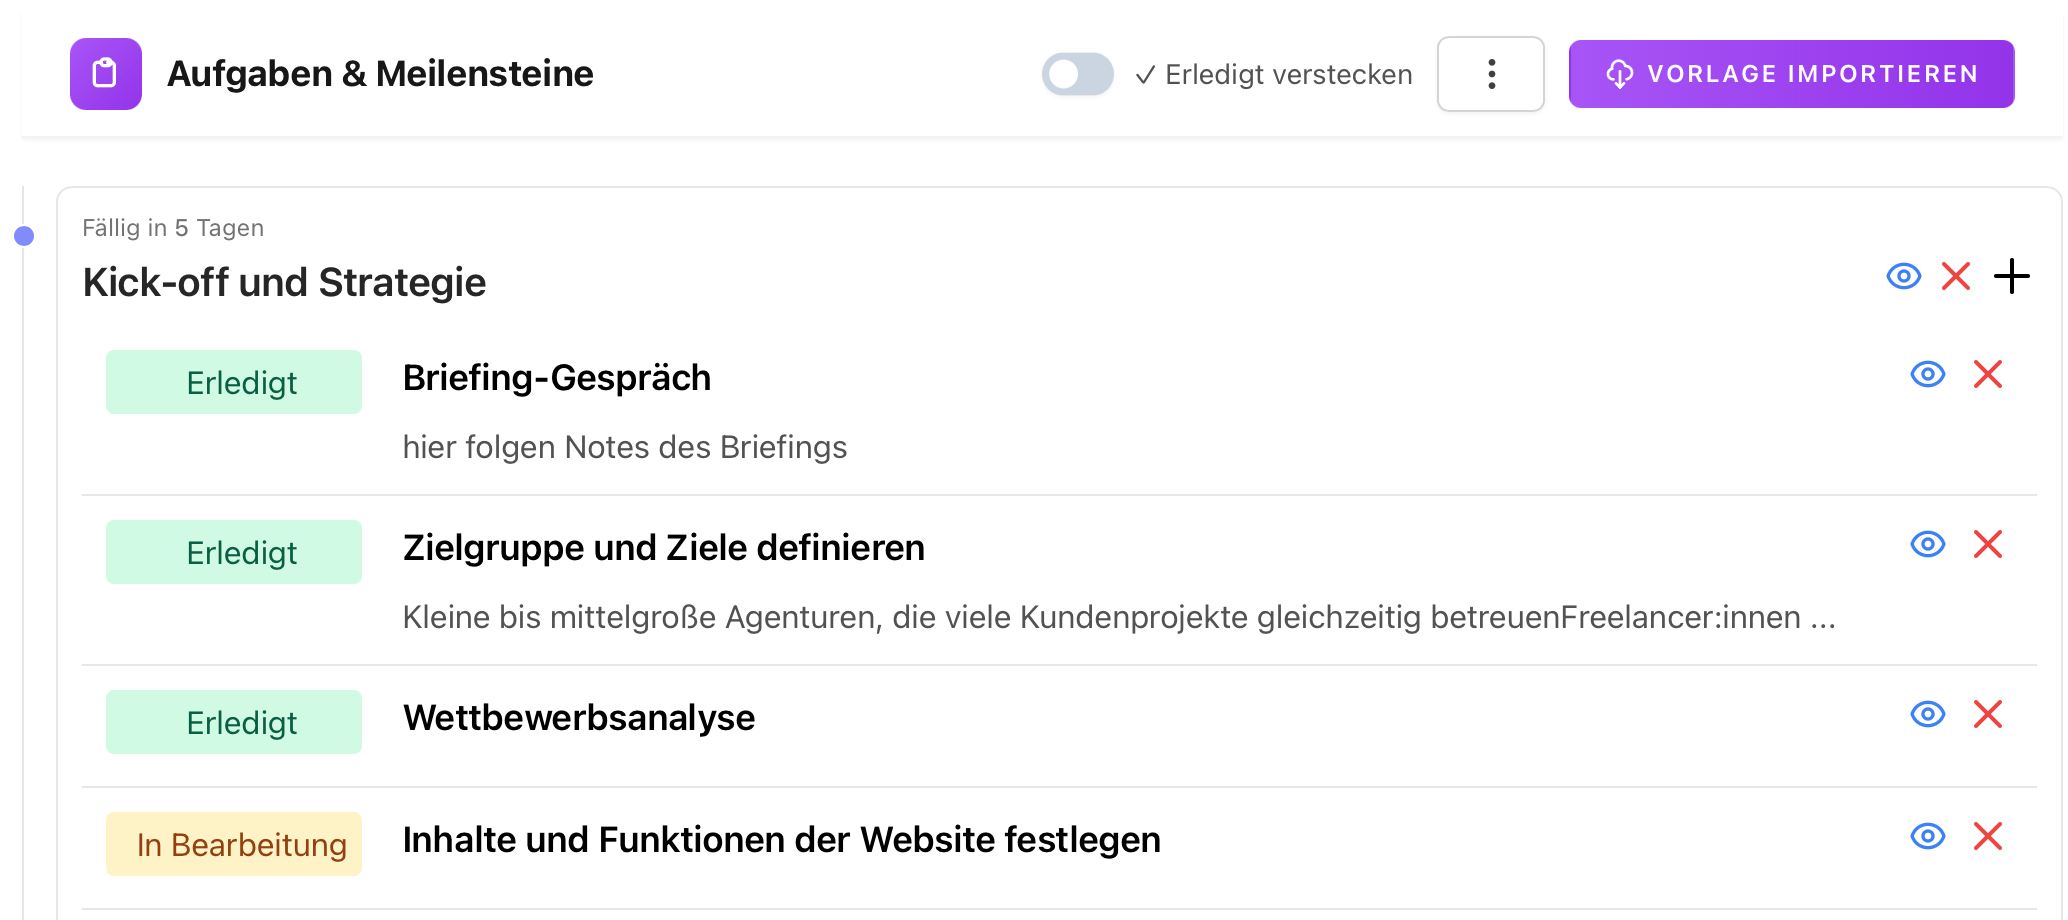
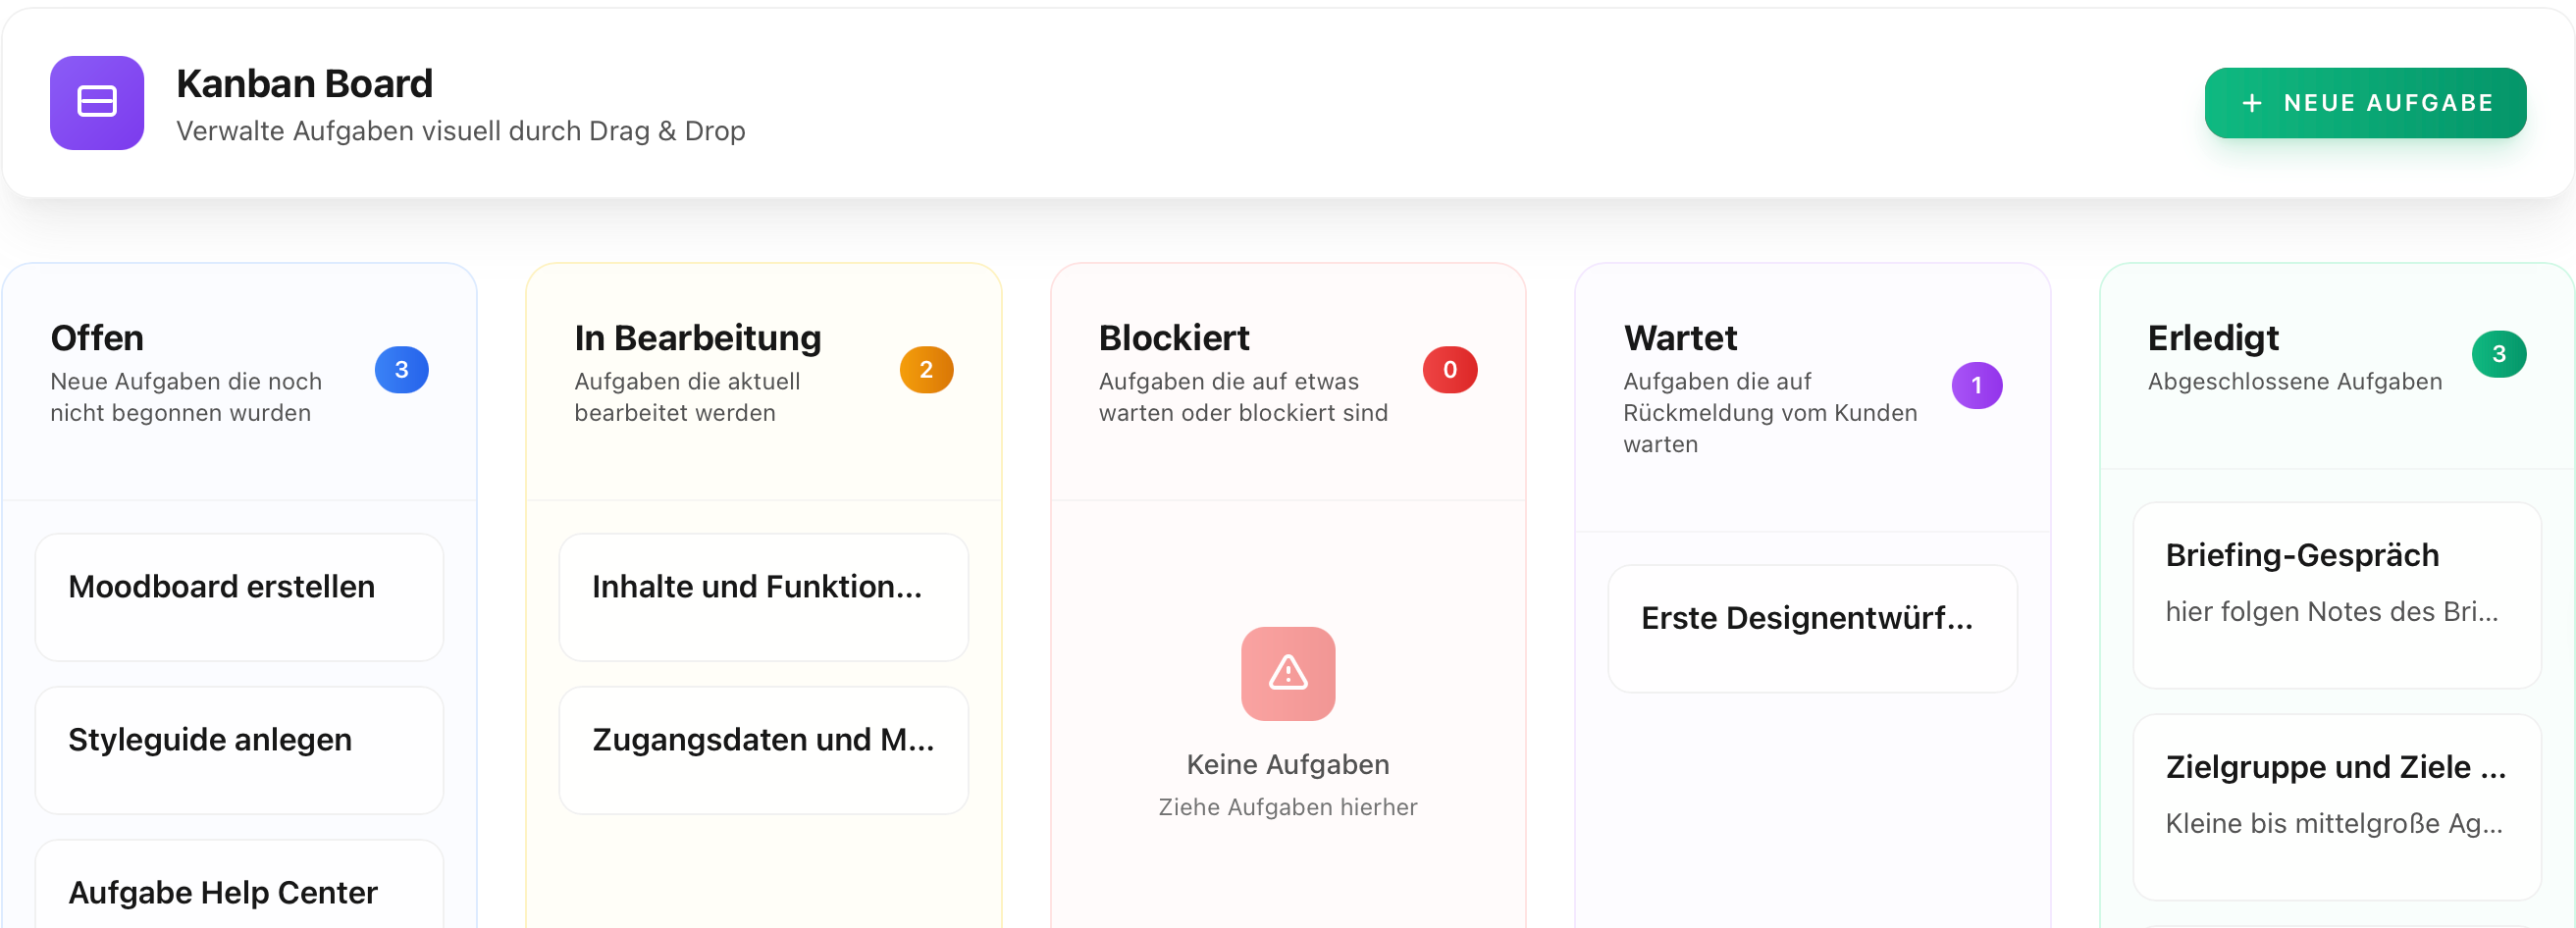
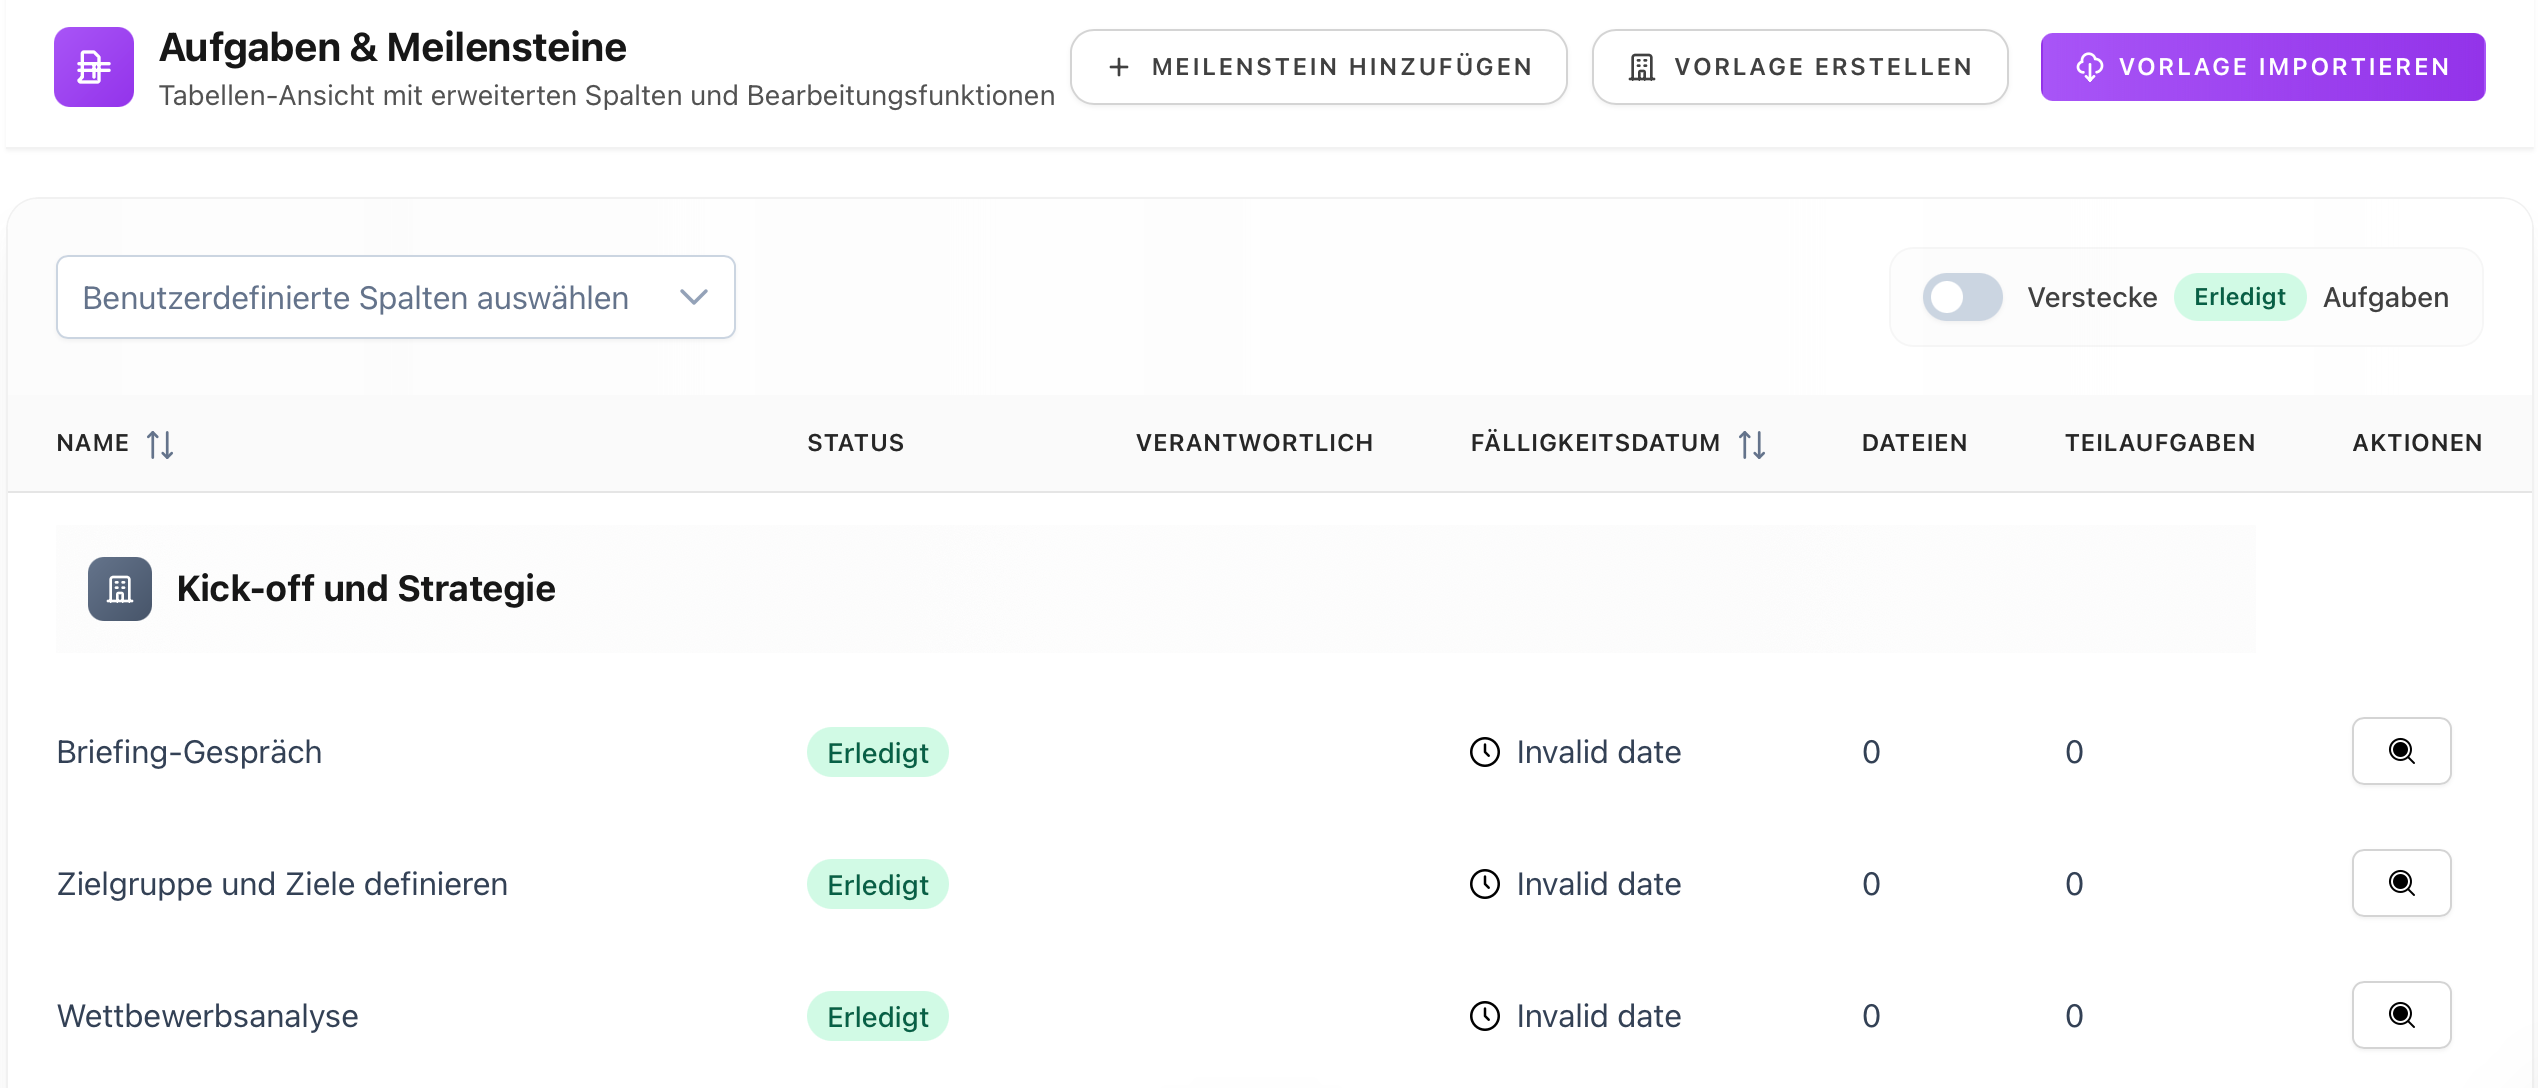
Only you can see these different views. Regardless of which view you’re in, you can add and edit tasks anywhere. These are simply different ways of displaying the same content.
➕ Create New Tasks
Here’s how to create a new task in a project:
Open the project you want to work on.
Select one of the views (List, Board, or Table).
Click “+ Create New Task.”
Give your task a title.
If needed, add additional information such as a description, assignees, or due date.
When creating a task, you can select a milestone from the dropdown menu or leave it set to “No Milestone.” Tasks with and without milestones coexist within the same project—tasks without milestones appear at the very top in the “Tasks without Milestones” section. Milestones are helpful when your project has multiple stages; for smaller projects or spontaneous ideas, a task without a milestone is often sufficient.
✏️ Edit tasks in detail
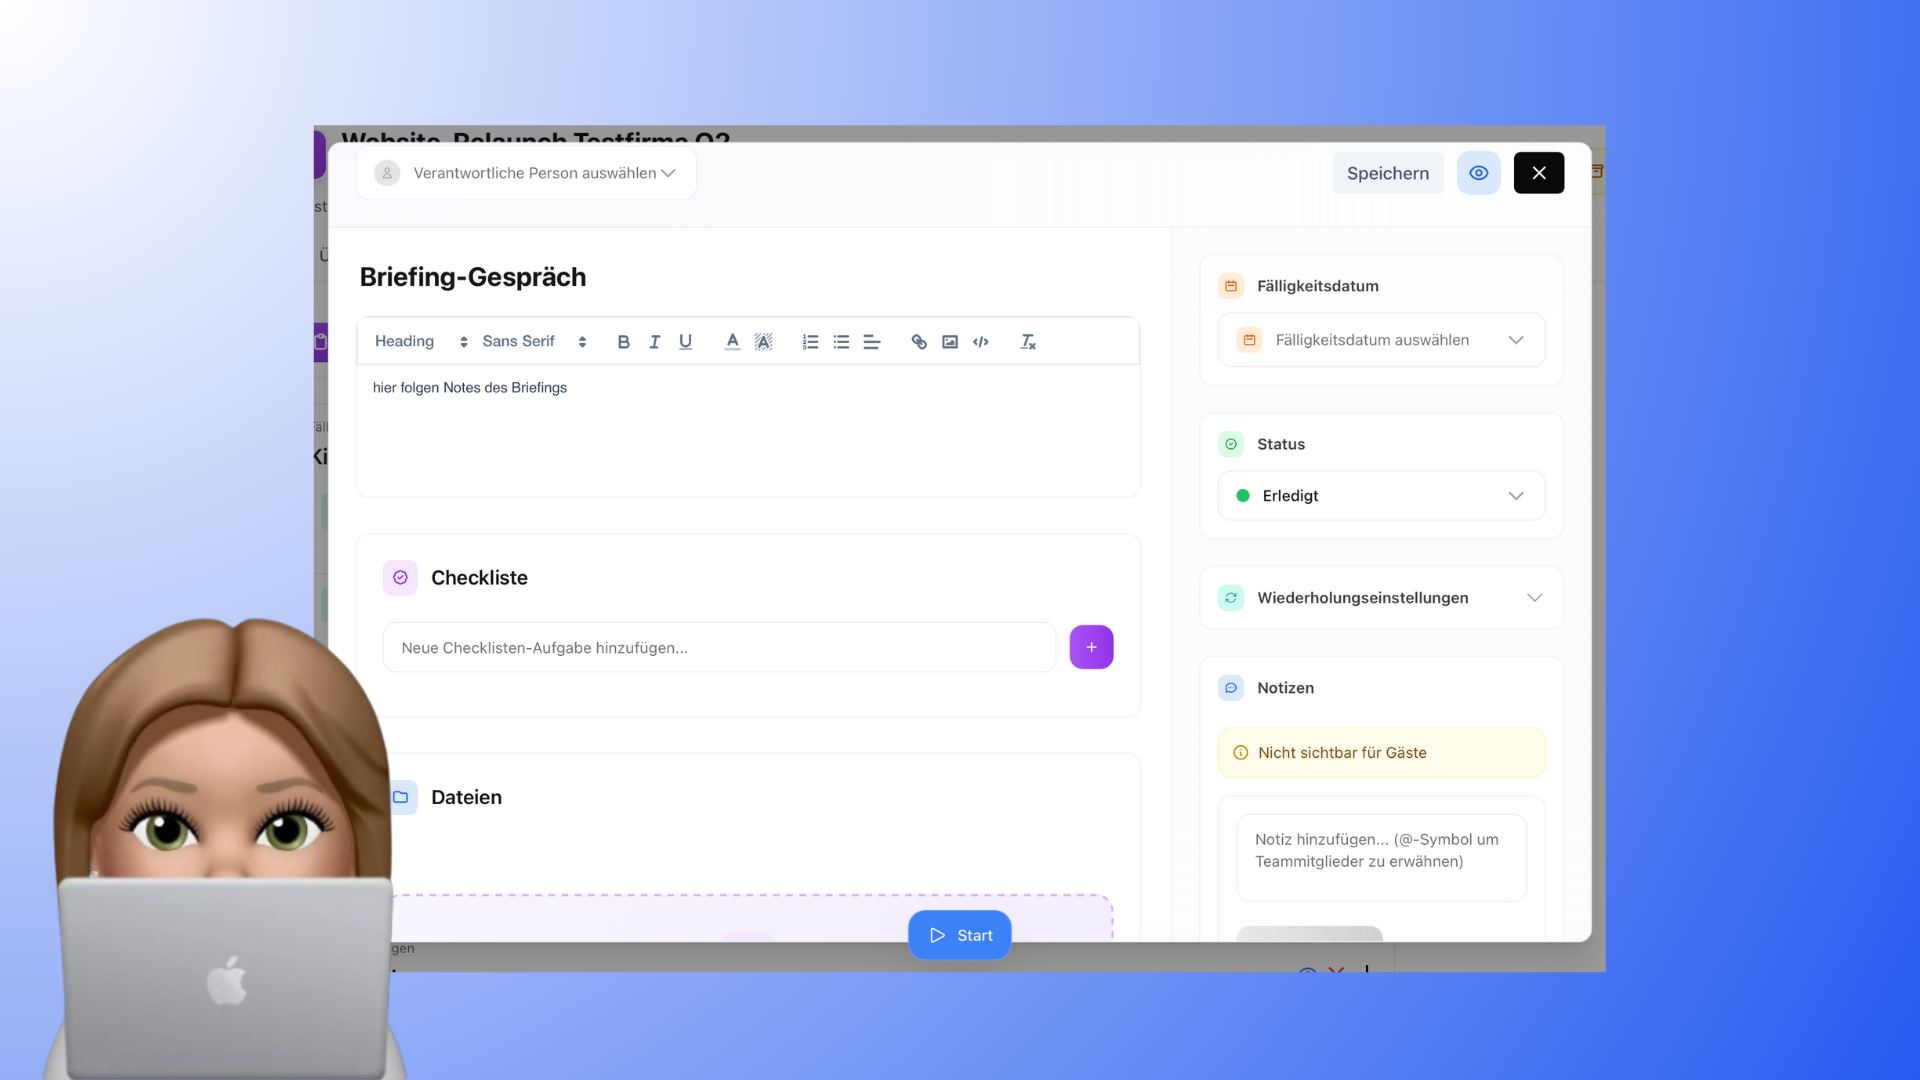
You can edit and expand a task at any time. Among other things, you can:
Add a description with formatting such as bold, italics, lists, links, and headings
Create checklists for subtasks
Upload files or videos
Assign a responsible person
Set a status (Open, In Progress, Completed, Blocked, Pending)
Set a due date
Set up recurring tasks (e.g., regularly recurring tasks)
Set start and end dates
Add notes with @mentions
All details can also be changed later. Tasks can also be deleted at any time if they are no longer needed.
👥 Edit multiple tasks at once
Instead of editing each task individually, you can edit multiple or all tasks in one step in a project’s task view: assign them to a team member or guest (or remove the assignment)—or change their status, for example, by setting them all to “Done.”
To do this, click “Bulk Edit” in the toolbar at the top right. The menu is divided into two sections—Assign Assignee and Change Status—each with the same four options:
All Tasks — applies to every task in the project.
All in a Milestone — applies only to the selected milestone.
All without a milestone — applies only to tasks outside of milestones.
Selected — activates a selection tool with checkboxes so you can specifically select individual tasks and edit them together.
In the dialog box, select the assignee (team member, guest, or remove assignment) or the new status (Open, In Progress, Completed, Blocked, or Pending) depending on the action, then confirm. Tasks that already have the desired assignee or status are skipped—you’ll receive a brief notification indicating how many were updated.
Note: A maximum of 200 tasks are processed per operation. For larger projects, narrow down the selection using milestones or checkboxes.
📊 The Tasks Table in the Project
In the project, you’ll find the Tasks tab. There, all of the project’s tasks are listed in a table, grouped by milestone. Tasks without a milestone are grouped together in a separate section at the bottom.
Edit directly in the row: You can change the status, assignee, due date, and priority by clicking in the respective cell—you don’t need to open the task to do this. Check the box on the far left to mark a task as completed. You can edit the name using the pencil icon that appears when you hover over the row; clicking the name opens the task in detail.
Search and filter: Above the table, you can search task names and filter by status or responsibility. Selecting “Hide Completed” removes completed tasks from view.
Customize columns: Under “Columns,” you can choose which information the table displays—including your own custom fields. You can save a configuration you use frequently as a named view and restore it with a single click. These views apply only to you personally in this browser, not to the entire team.
Reorder by dragging: When you hover over a row, a handle appears on the left. Use it to drag a task to a different position or directly into another milestone. As long as a filter is active, dragging is disabled—otherwise, the new position would only apply to the filtered selection and disrupt the rest of the order.
Edit multiple items at once: Use the checkboxes to select as many tasks as you like. You can then set the status for the selection as a group, assign them to someone, or delete them. You’ll be prompted before deleting.
Create a new task: At the end of each group, you’ll see “Add Task”—this places the task directly into the correct milestone. The “New Task” button above the table creates it in the first group. The input field remains open, so you can type in multiple tasks one after another.
👥 Customer view of tasks
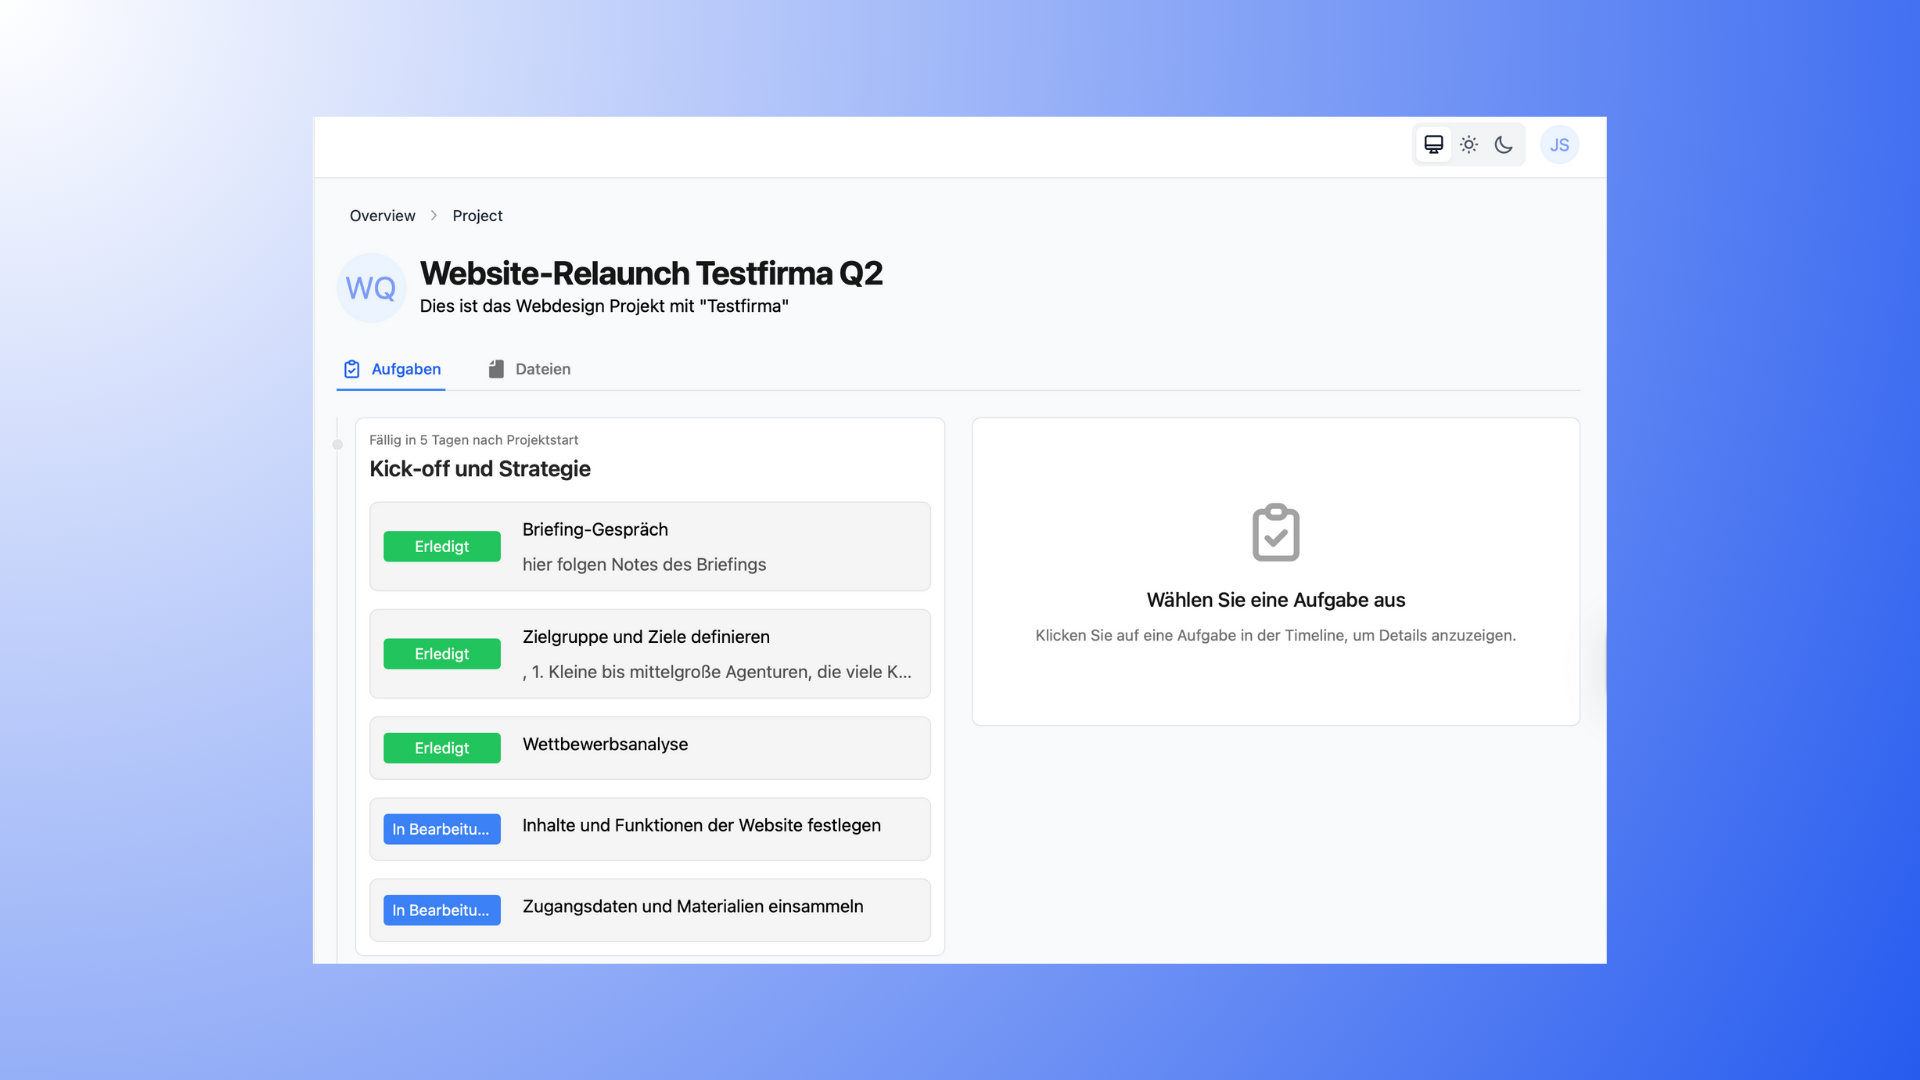
Customers have their own task view in Proyex. Here’s what to keep in mind:
Customers see all tasks in the project
Customers see the current status of the tasks
Customers cannot edit or comment on tasks
Clients can upload files to tasks, provided this is permitted. You can control file uploads for guests on three levels: as a team default in the portal settings, per project in the project settings, or per task directly in the task toolbar.
For example, you can create a task where your client uploads a briefing or ideas as a file, right where they belong in the project.
🔄 Convert a task to a revision
If a task needs to become a revision cycle, you can convert it directly—without having to manually transfer the content.
Open the task you want to convert.
Click the revision icon (the arrow icon next to the other actions) in the toolbar.
Confirm the conversion in the dialog box.
The name, description, and all attached files will be automatically carried over to the new revision. The deadline is based on the task’s due date or—if none is set—on your team’s default revision duration.
Note: The original task remains intact. A new revision is created, and you’ll be redirected there immediately.
💡 Good to Know
Tasks can be created in any view. The view only changes the display, not the content.
Recurring tasks are particularly well-suited for regular workflows. You can also create templates from them. Learn more at here.
Milestones help you group tasks by topic and map out larger project phases.